Drainage 101: Everything You Need To Know About Channel Drains


Drainage 101: Everything You Need To Know About Channel Drains
Did you know that water damage is the second most common insurance claim in the U.S., with an average cost of $10,000 per claim? Water damage costs homeowners billions annually, with poor drainage often to blame. Whether it’s a flooded driveway, a soggy patio, or eroded landscaping, excess water can wreak havoc on your property. Enter the channel drain, a simple yet powerful solution also known as a trench drain or strip drain. This linear drainage system efficiently collects and redirects water, protecting your home or business from costly repairs. In this guide, we’ll cover everything you need to know about channel drains: what they are, their benefits, how to install them, and essential maintenance tips. Whether you’re a homeowner tackling driveway drainage or a landscaper designing a landscape drainage solution, this guide will equip you with the knowledge to manage water effectively. Let’s dive in!

What is a Channel Drain?
A channel drain is a long, narrow trench designed to capture surface water and direct it away from areas like driveways, patios, or walkways. Unlike traditional round drains, channel drains offer a larger surface area for water collection, making them ideal for flood prevention and heavy rainfall.
Types of Channel Drains
- Polymer Concrete: Highly durable and chemical-resistant, perfect for heavy-duty drainage installation.
- Plastic: Lightweight and budget-friendly, a top choice for residential patio drainage.
- Metal: Made from stainless or galvanized steel, these are built for industrial or high-traffic areas.
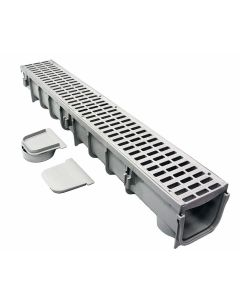
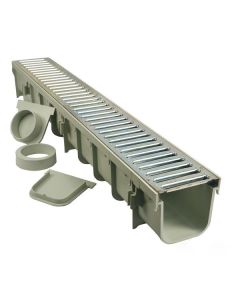
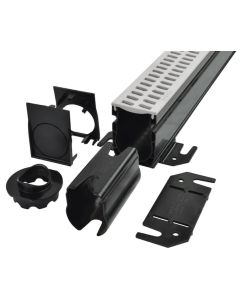
Key Components
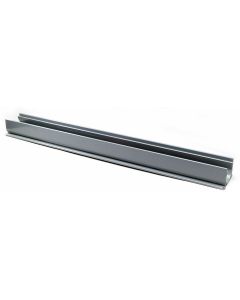
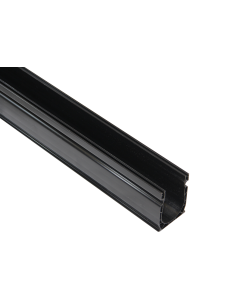
- Channel: The trench that collects water, typically made from concrete, plastic, or metal.
- Grate: A removable cover that lets water in while keeping debris out.
- End Caps and Outlets: Connect the drain to underground pipes, ensuring seamless water management.
Channel drains work by channeling water to a designated outlet, preventing pooling and protecting your property.

Benefits of Channel Drains
Why choose a channel drain over other drainage systems? Here’s what sets them apart:
- 1. Superior Flood Prevention
- - Channel drains handle large volumes of water, making them a go-to for driveway drainage and landscape drainage. Say goodbye to water pooling around your property.
- 2. Enhanced Safety and Aesthetics
- - Standing water is a slip hazard and an eyesore. A well-placed trench drain system keeps surfaces dry and safe while blending seamlessly into your design, whether it’s a sleek patio or a functional walkway.
- 3. Versatility Across Properties
- - From residential patio drainage to commercial parking lots, channel drains adapt to any setting, sloped or flat, and can be customized with various materials and grate styles.
- 4. Boosted Property Value
- - Proper drainage protects foundations and complies with building codes, increasing your property’s long-term value and appeal.
How to Install a Channel Drain
Installing a channel drain is a manageable DIY project with the right steps, or a job for a pro if you prefer. Here’s how it’s done:
Planning and Preparation
- Locate Problem Areas: Identify where water pools (e.g., driveways, patios) to position your drain.
- Check the Slope: Aim for a 1-2% slope toward the drain for smooth water flow.
- Select Your Drain: Choose a material and size based on your needs—plastic for light use, polymer concrete for durability.
Checklist
- Measure twice! Ensure proper length and depth.
- Verify local building codes.
- Avoid low spots where water could stagnate.
Step-by-Step Installation Guide
- Dig the Trench: Excavate a trench slightly wider and deeper than your channel drain.
- Set the Channel: Place the drain in the trench, ensuring it’s level and aligned with the surface.
- Connect the System: Attach end caps and outlets to link the drain to underground pipes or a stormwater system.
- Secure It: Backfill with concrete or gravel to lock the drain in place.
- Add the Grate: Snap on the grate, and test the flow with water.
Tools and Materials
- Shovel or trencher
- Level and measuring tape
- Concrete or gravel
- PVC pipes and connectors
- Safety gear (gloves, goggles)
Need more help? Check out our Channel Drain Installation Guide for more visuals and tips!
Maintaining Your Channel Drain
A little upkeep goes a long way in keeping your drainage system running smoothly. Here’s how to maintain your channel drain:
- 1. Regular Cleaning:
- Remove leaves, dirt, and debris from the grate monthly.
- Flush the channel with a hose to prevent buildup.
- 2. Inspections:
- Check for cracks, rust, or damage after heavy storms.
- Ensure the grate sits flush and secure.
- 3. Troubleshooting Common Issues:
- Clogs: Use a plumber’s snake or pressure washer to clear blockages.
- Cracks: Seal small cracks with waterproof caulk or replace damaged sections.
With proper drainage maintenance, your channel drain will protect your property for years.
Frequently Asked Questions
1. Can I Install a Channel Drain Myself? Yes! With basic tools and planning, it’s a DIY-friendly project. For complex layouts, hire a pro.
2. How Much Does a Channel Drain Cost? Prices range from $100-$5000+ for residential systems, depending on material and length.
3. How Long Does a Channel Drain Last? Up to 20 - 30 years with proper care

Reflection
Channel drains are a game-changer for water management, offering a reliable way to prevent flooding, enhance safety, and protect your property. Ready to take control of your property’s water flow? Start planning your channel drain project today—or reach out to our Drainage Experts for personalized advice. Let’s keep your space dry and thriving!


About the Author

Related Products


Comentarios
Great overview! I appreciate how the article explains types of channel drains, installation tips, and maintenance. The info on slope and choosing the right material makes it easier to plan a drainage solution that actually works.
Great overview! I appreciate how the article explains types of channel drains, installation tips, and maintenance. The info on slope and choosing the right material makes it easier to plan a drainage solution that actually works.